Layer Effect Settings
You can apply different realtime effects to layers. For a more detailed description on how to use layers please have a look at the layer primer. Effects can be enabled per layer using the FX sign.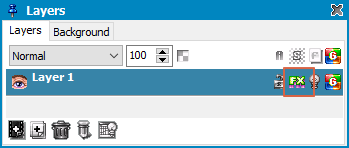
Right click on the icon and select Effect Settings... to enter the settings dialog.
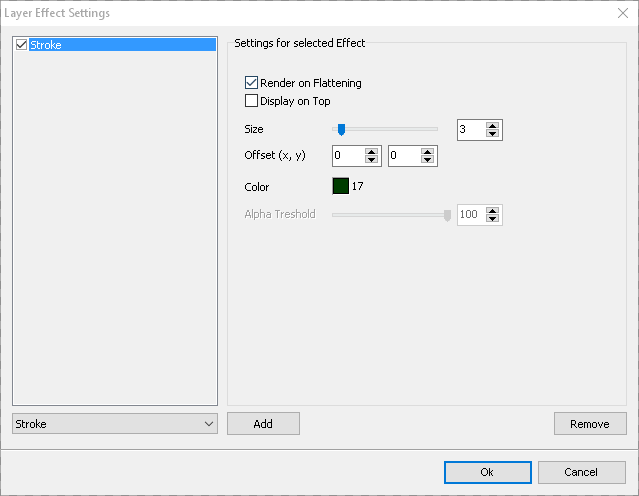
You can add a series of layer effects to be applied to the layer contents in realtime. At the moment there are only two effects, stroke and Display other Project. The right area displays the settings for the effect that you select on the left side.
Common options are Render on Flattening to apply the effect finally to the image when flattening layers and Display on Top to let an effect render itself on top of layer contents instead of letting the layer content render on top.
Stroke
The stroke effect surrounds the edges of the layer object by a round brush stroke of given size and color.
You may use the offset to displace the stroke. When using alpha transparency you can tell by alpha threshold which pixels are to be seen as edges. They do not need to be fully transparent.
Display other Project
You can include another project to be displayed with a layer.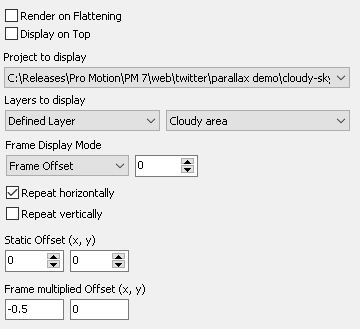
Used to join multiple projects together for mock-ups or to have a base animation for rotoscoping, e.g. a video of a real object movement to draw on top. Select which layers of this project are to be displayed. You may choose between the typical selections like "all" and "visible" but you can also select a specific layer.
To define which frames to show from the other project you can choose the frame display mode being single frame by giving its frame number or a frame offset to either let the frames animate 1:1 or to decouple the frame numbering.
If the external project is smaller than the current one or if you want to use dynamic offsets (see below) then you can make the contents Repeat horizontally or vertically. You may use the Display Offset to displace the project display position statically.
Additionally there is a Frame multiplied Offset. There you can enter values that are used as displace factor combined with the frame number of the current project. This can be used to let backgrounds scroll while your animation is running, e.g. for testing parallax scrolling. The numbers may be floating point values.
Re-apply Color Palette
Use this effect to achieve one of the following processing workflows:1. Make the pixels of the current layer combine with the layer below based on their index in the palette and not on RGB color like the layer blend modes do. This can be used to just add the palette index values from the current layer to the layer below resulting in new palette indices to be displayed.
Also you can make the pixels of the layer below to use the sub palette (e.g. ramp) that the current layer's pixels use.
2. Make the pixels of the layer below to use either the current's layer palette or a palette file.
(Example project below)
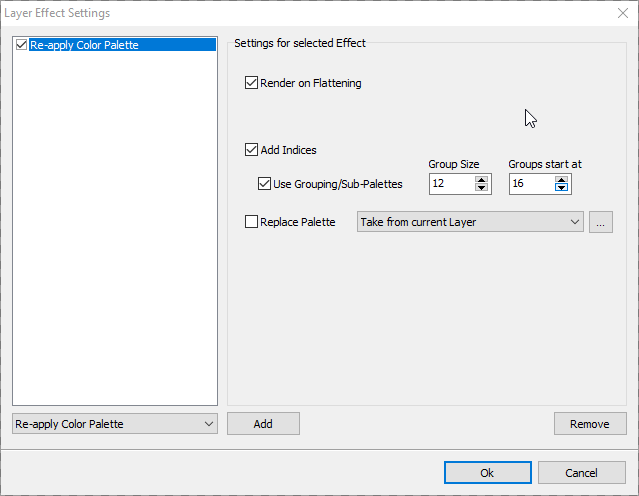
Select Add Indices to combine the pixels of the current layer with the layer below. This will just add the color index of the pixels of both layers and display the pixel using the color of the calculated pixel index.
If you enable Use Grouping/Sub Palettes then you can define that you don't want to have a simple add of the indexes but make them use another sub palette or color group. It assumes that you have color ramps in the palette with an equal size starting at a certain position.
For example the default color palette has some black/white and gray entries at the beginning, but with color 16 there are consecutive color ramps from bright to dark having different hues. These are like red, brown, orange... color ramps from bright to dark. Now imagine you have pixels in a layer that use the first color ramp which starts at color index 16 and ends with color index 27 which are 12 colors as mentioned.
You can create a new layer above that contains the layer effect and where you enable the option Use Grouping/Sub Palettes and use the Group Size 12 and 16 for Groups start at. Select any color from one of the color ramps and draw on top of the pixels of the layer below. The pixels now use the corresponding color group visually while the actual pixels of the layer below remain untouched.
reapply_color_palette_effect.pmp is a sample project. There is a bottom layer showing some gradient filled squares. The layer Layer assigning other ramps has the layer effect enabled and is set up to reassign color groups as described. Make it visible to see the effect. Then switch the FX icon on/off to see the real pixel contents of that layer.
The layer Layer applying other color palette is used to apply a separate color palette. Enable this layer and make Layer assigning other ramps invisible. It uses a separate color palette which now overrides the palette of the bottom layer wherever it contains opaque pixels. Again use the FX icon to see the true pixel contents of that layer.
Drop Shadow
Creates a simple, single colored drop shade for opaque pixels.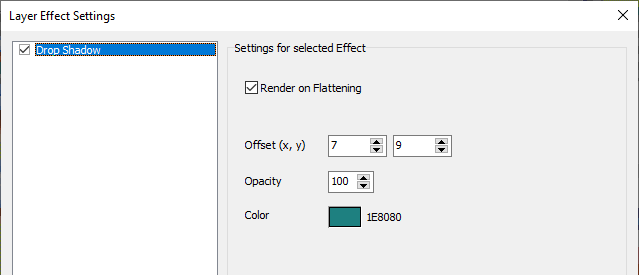
You can define the Offset to display the shadow more to the sides, an Opacity and a Color used for the shadow pixels.
Related topics
Amiga AGAAmiga OCS
C64 Graphics
Layer Settings
Layers Primer
Last modified: 29 January 2023