Layer Settings
The layer system is a very powerful tool that enables you to display several frames of an animation or image upon another. It also supports groups of layers to allow for better structuring. Each layer can be set to be visible or invisible and may also use an opacity value to make it semi transparent or a blend mode to combine the layer pixels with those of layers below. Using layers you can separate your image or animation into different structural pieces and work on them separately without interfering with other parts.For a more detailed description on how to use layers please have a look at the layer primer.
The layer management window is divided into tabbed areas as described below.
Layers Tab
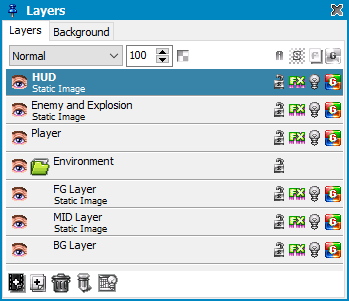
There are two content types of layers single image or animation. An animation layer always has the number of frames the animation project is supposed to use while a single image layer always display the same image for all animation frames. This is useful for static backgrounds that are part of an animation or to test the animation against a typical background it is overlaid on.
Also you can have layer groups to organize layers that belong together.
You can change the layer blend mode for the current layer directly in the top area of the layers window as well as the opacity.
Blending modes are used to create special effects with combining colors of pixels of different layers.
Use the icon besides the opacity level to define or change the transparent color index for all layers at once.
Indicator and switches aside:
Alpha transparency... click to enable/disable Alpha Layer
Global color palette... equal Palettes for all frames (global palette). Click to change
Active Stencil... indicates if a stencil is enabled and the corresponding pixel selection is active. (see also palette window)
Active spare frame... if highlighted then a spare frame is defined for the current project (see also menu Frame)
Sometimes it happens that you accidentally modify the wrong layer. To prevent this you may manually protect a layer from being modified with drawing tools by using the lock.
Double click on a layer entry to change its settings.
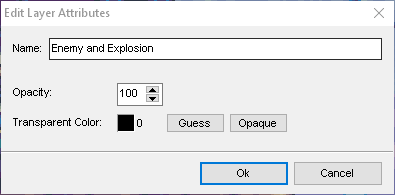
Besides the opacity level you can define a transparent color if the project does not use alpha transparency. It is suggested to use either the first or the last palette entry to be transparent so that it can be identified easily. If you don't have a transparent color, yet you may use guess to let the application determine the color that might fit or select a color manually by clicking on the color field. To remove a transparent color select the opaque option.
Each layer entry has a couple of options.

The eye toggles the visibility of the layer but has some extra functions:
Hold Alt and click on a visible layer to switch all others off. Click again to revert.
Hold Ctrl + extra keys and left click to select the layer contents on the canvas:
| No other modifier key | Set the selection to contain all pixels in the layer leaving transparent parts unselected. |
| Shift | Add the pixels of the layer to the current selection. |
| Shift + Alt | Logical "and" that removes all pixels from the selection that are transparent in the layer clicked on. |
| Alt | Removes all pixels of the layer from the selection. |
Right click to clear the selection.
Use FX switch effects on/off for the respective layer.
You can also enable onion skinning using the light bulb.
A layer may either use a single (global) palette for every frame or individual frame palettes. The G symbol toggles a layer or frame based color palette mode.
You can change the order of the layer stack by click and drag a layer entry to the required position.
Select multiple layers and layer ranges by holding extra keys Ctrl, Shift, Alt.
Right click on a layer to access additional functions. Most functions are self explaining. Turn into Image or Turn into Animation lets you switch the layer type and Flatten Effects will finally render defined layer effects into the layer itself.

Use the buttons at the bottom to create, delete or edit a layer or layer group. The light table settings let you define the behavior of the onion skinning feature.
When using alpha transparency with your project the color/alpha plane toggles and a plane edit mode selector are available. See the alpha primer for more information on that topic.
Holding Ctrl / Shift combinations when selecting layers you can select multiple of them to apply functions with the context menu or to apply transformations or to copy and paste them around.
Background Tab
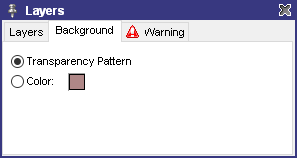
You can define how to render the background if there are portions that are transparent through all layers. The overall background that is rendered can be either a transparency pattern or a color.
Warnings Tab
This section shows different warnings concerning the layer settings, e.g. if you have a layer selected to draw, but it is invisible.Related topics
Alpha PrimerFloating Selection
Layers Primer
Menu Edit
Menu Options
Image/Animation Export Settings
New Project
Tile Mapping Primer
Transformations
Workspace
Last modified: 29 January 2023