Light Table Settings
When you are drawing animations then you want to have smooth movements. One approach to have smooth movements is to first draw just some key frames defining the overall movement. See Layers Primer for some details.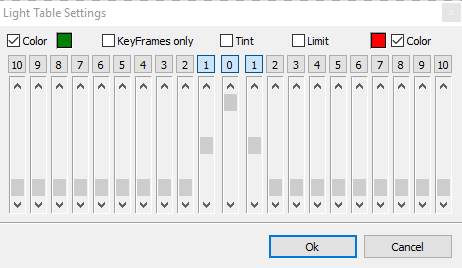
With the light table you can define how to display previous or next frames based on the position of the current frame. To differ previous and next frames in the animation flow you can give them a separate coloring, e.g. red and green. By default, the light table shows all non-transparent pixels with the defined color, so they look like plain shapes. You can use Tint to keep the original pixel details and to just give them a colored look.
Every frame that is enabled for display must have an opacity setting. Frame "0" is the current frame you are drawing. The numbers to the left and to the right define the previous or next frames to be displayed.
Next and previous frame means the position in the animation as +X or -X.
When activating Key Frames only then X is not the physical frame position but refers to a special key frame definition. You can define a frame to be a key frame by using the time line in the animation control panel or by using Toggle Key Frame in menu Frame.
If you want to hide light table frames that go beyond the playback limit the activate the Limit option.
To display the onion skinned frames you must enable the light table for the respective layer.
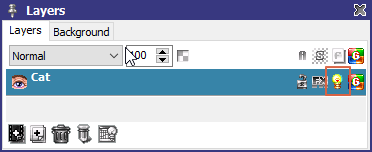
Enabled onion skinning can then look like this:

Related topics
Animation Control PanelKey Frame Settings
Layer Settings
Layers Primer
Last modified: 29 January 2023