Create new Project
This Dialog is displayed when creating a new animation or image project.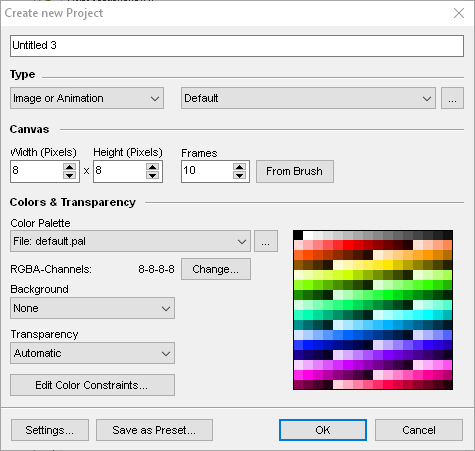
When creating a new project you can choose of different predefined media types:
·Image / Animation creates a typical project based on one or more images in a row.
·Tile Maps creates a new tile map project where your images are built from tiles in a tile set. See Tile Mapping Primer for further information
·Bitmap Font is used to create images used as a bitmap font. See Bitmap Fonts for further information.
Instead of editing all values in the project creation dialog you can select from a list of project presets that are predefined. You can also create your own presets for recurring types of projects. Use the drop-down box to select one of the presets. Click the button behind the selection box to enter the preset management Define the Width and Height for the new image or animation and set the Number of Frames you need. Tile map projects define their dimensions as number of tiles where you additionally set up tile width and height in pixels.
From Brush uses the current brush's width/height and if it's an animated brush the number of frames it contains.
Choose a color palette to be used from default, the current project or a selected file. The button behind the selection lets you choose a color palette file from the palette browser.
Define RGBA-Channels depending on your needs.
There are different Background modes to select from
·None will display a checker pattern for fully transparent areas.
·Palette Entry lets you select a certain color palette entry to be transparent. Use the color selector that is displayed to open a color palette window for selection.
·Black (nearest Palette Entry) uses the first color index that is found in the palette to be pure black or nearest to.
·White (nearest Palette Entry) uses the first color index that is found in the palette to be pure white or nearest to.
·Color can use any color that can be defined freely using the color selector
The background color settings can be changed after project creation in the Layer Window background tab.
Define how Transparency is to be handled.
·Automatic will use the background color palette index as transparent palette index if defined or 0 if undefined.
·Palette Entry lets you select a certain color palette entry to be transparent. Use the color selector that is displayed to open a color palette window for selection.
·Alpha Transparency if you want your project to support an alpha plane. See Alpha Primer for further information.
With Edit Color Constraints you can define certain color limitations.
Settings will open additional project settings that are to be used such as pixel size, backup settings, GIF details etc..
If you want to reuse all the settings then you can define a preset from them with Save as Preset.
Related topics
Alpha PrimerBitmap Fonts
Menu File
Project Preset Edit
Tile Mapping Primer
Last modified: 29 January 2023